baby boshi


babyboshi


I wanted to make a boshi for some time now. Boshi (Japanese: hat) is a recent trend in Germany and stands for handmade (mainly crocheted) hats. The trend was started by two students and now you can see even big rough guys sitting quietly with a crochet hook.

Our newest family member was in acute need of a hat, so I had an excuse to try my hands on making a boshi. During our postpartum days, when I couldn’t do much more than lying in bed and cuddling with the new baby, this was a very welcome occupation.

babyboshi2


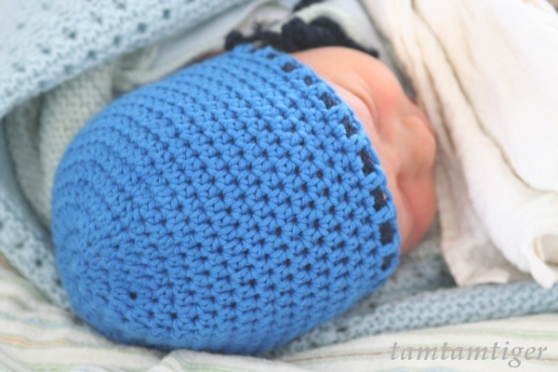
Here is my version of a baby boshi (head circumference ca. 34 cm):

Yarn: Debbie Bliss 50% cotton, 50% merino wool; crochet hook: 4mm

Start with 5 chain stitches, close them to a loop with a slip stitch. Into this loop make 8 half double stitches. In the next round double each stitch (16 half double stitches), and in the next round double them again (32 half double stitches). Then double every fifth stitch until you reach the desired circumference minus one cm (56 stitches). Continue with double half stitches until the you reach the desired hight of the hat. Finish with one round of double stitches.

For the band I used a contrast color and, using chain stitches, made one long chain, which I wove into the double stitches of the back half of the hat. I made a second short chain with small loops on either side which I wove through the double stitches of the front half of the hat. The long ends of the long chain I thread through the loops of the short chain. This allows to adjust the width of the hat a little bit when binding the hat.

This is my contribution to Creadienstag and Made4Boys.

This post appeared first on tamtamtiger.wordpress.com.
Hat for the man

IMG_9864a

This is one small item I did manage to sneak in during the turbulent pre-Christmas time. Its a hat for the best husband to wear under his bike helmet. I used the same pattern before here. But this time I had to extend the pattern’s sizes (the pattern stops at 56, but the best husband needed 57). I also made it round instead of pointy at the top and extended the hight about one centimeter (which turned out to be not necessary). The fabric is a very soft and cozy cotton stretch jersey from hilco.

Two critique points I have about this hat. The first is about my sewing machine. It is a Brother where I cannot adjust the pressure of the sewing foot and the pressure is quite strong. Sewing jersey with it is not so easy with the result that I stretched the border too much. I must say that the cheep sewing machine which I had borrowed to sew the first hat was much more easy on the stretchy fabric. Second, the large ear-flaps are very practical but look a bit funny. Much smaller ear-flaps would be sufficient and would look less like a medieval helmet of some sort….. I consider to alter it.

Pattern: Wendezipfelmuetze by Klimperklein. This is a very well done e-book.

Fabric: Both, for inside and outside I used jersey from hilco.

Will I sew it again? Yes. I love this pattern. But it might be more suitable for children than for adults.

Finally!

2013.03.18.AlmostSpring.091a

Finally! Last Saturday the order from stoff.de finally arrived – after over a month (I ordered 11.02.13!)!  It contained the cotton Teddy fur I was waiting for. My big boy was supposed to get a nice warm hat for cold days – well, now he has a cozy colorful dino hat in time for spring. (Papa thought it looked more like a rooster than a dino?!? Easter is in the air.)

The outer fabric is the same as here. The pattern is a free pattern from Hamburger Liebe.

(T)Hat again

IMG_8830a

This is the first sewing project I am presenting here – and it is the first one for a very long time! I used to sew as a teenager and later a little bit on an off, but I did not touch a sewing pattern for over twenty years. While I was pregnant with my first boy six years ago I did sew two dresses, using a sewing machine a friend had found on the street (literally). Let’s just say this machine sewed…. and I didn’t have a pattern, I was basically cutting the dresses free hand. I did wear them, though. The fabrics I got from a great little store in Newark, NJ, they are really nice African prints and one day I think I will undo the dresses and transform them into something proper.

IMG_8838a

But today I wanted to show you the hat I made (I borrowed my neighbour’s sewing machine – Thank you!). Most hats are either too big or too short for my little one, so that they are either too loose or don’t cover forehead and ears. This pattern is great! It is an eBook from Klimperklein. I made the hat 1cm longer. The fabric outside is stretch jersey and inside sweat, both from a local fabric store. Would I sew it again? Bet ya!

From hat to toe

IMG_8813a

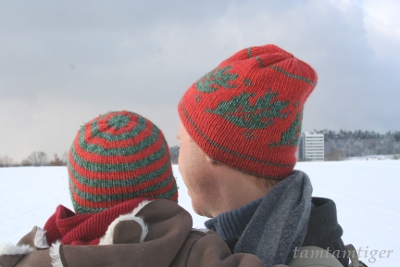
I am still without a sewing machine. I am all set up to start sewing again and I hope that I will have again a machine sometime after easter… Meanwhile I pick up the knitting needles whenever time allows. My favorite projects are small things, which I can finish in one or two evenings, like – hmm – hats!  Here are two I made for my boys.

IMG_8787a IMG_8786a


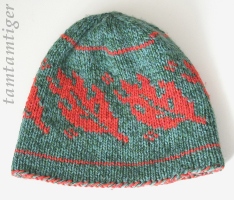
This one is a double layer hat. This is a great technique for a warm hat with a patters. Both layers are knitted in parallel on one set of needles and two threads on the finger, the loops alternate between front and back layer. The pattern is realized by just switching the threads from front to back layer and vise versa when the color in the pattern changes. The leave pattern on the hat is inspired by a pattern I saw on a headband, unfortunately I don’t remember the source.

IMG_8785a

And this is Kirsten Kapur’s Thorpe Hat (free pattern!). This hat is a great hat for kids and knitted from the top downwards! Thanks to the wonderful instructions, this is a fun and quick knit! The orange-green hats are wool, and the right hat is cotton (I don’t remember the brands).