Waterfall Shirt

(before dyeing)

So far my sewing efforts mainly concentrated on skirts because I felt that well fitting tops are so difficult to achieve. Therefore I took on the challenge to find (at least) three well fitting patterns for tops. Actually, this was part of my pledge for this year’s Me Made May Challenge (slowly but surely…)!

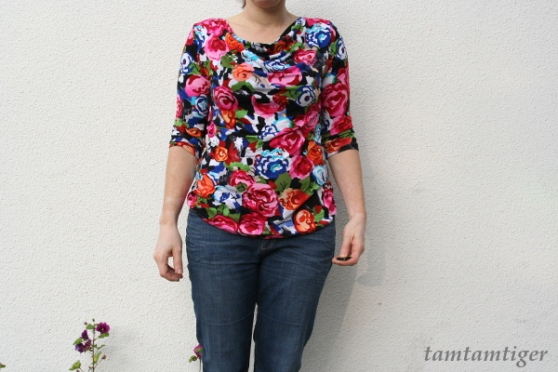
Top-challenge no. 1 is the waterfall shirt “Scarlett” from Patty-Doo. It took me three iterations until I felt comfortable. First, I selected the wrong size (I always tend to make things too big), and then I had to make the neckline higher (the water was falling a bit too low). But now I am really happy with it!

(after dyeing black/gray)

For practice I used a fabric I bought online, which I obviously couldn’t really touch nor properly see before it arrived at my doorstep. The fabric I finally received was something quite different from what I had expected (way too bright – see the first picture above, and heavy falling viscose instead of a light cotton jersey). I had bought 3m (well, yes) and felt that for practice this (and some other leftover fabric) was definitely good enough. So I put the tops together (four altogether) and then dyed them over with black (above, rather grayish) and blue (below).

(after dyeing blue)

One can still see the original pattern, but the colors are not as bold, and I think the flowers are even more recognizable as such. I am actually rather pleased how the tops came out in the end and really like to wear them!

Pattern: Patty-Doo Waterfall Shirt “Scarlett” (thanks for the fantastic video tutorial!). Alterations: I shortened the neckline as described in the pattern instructions.

Fabric: The fabric was marked as a cotton jersey, but I am pretty sure it is (or contains) viscose.  The rather bold pattern I dyed over using black and blue dye. The pattern is still visible but not as bright.

Will I do it again? Yes!!

This is my contribution to RUMS.

Dieser Blogpost ist auf Englisch. Ich lese und beantworte Kommentare aber gerne auch auf Deutsch.

The post Waterfall Shirt first appeared on tamtamtiger.wordpress.com.
Sun-Print Skirt

This has been a very longterm project. Two years ago I prepared this fabric for a skirt but never got around putting it together (I was too scared to screw it up). But ow I felt confident enough to finish it and enjoy wearing my new skirt during the last warm days of summer.

Inspired by Alisa’s sun-print bag I tried this technique on a very hot sumer day. First I cut out the pieces for a skirt (my trusted burda pattern, you can see previous versions here, here, here, here and here). Then I colored the fabric with diluted fabric paint and quickly pressed on it leaves I found in the garden. The whole thing I put to dry in the hot sun.

The dried fabric now looked like this – you can see the shape of the leaves:

I am still not sure how exactly this works. Alisa believes that this happens because the leaves absorb the pigments from the wet color. This could be one possibility. An other possibility is that the fabric dries faster where it is not covered by a leave. The water, containing the paint particles, is then sucked out from underneath the leaves (through capillary effects and the moisture gradient) so that there is then less paint where the leaves have been. Or the reason cold be an entirely different one. I am a geek and I love to understand things. So, if you have knowledge (or an opinion) about this I love to hear it!

So, this is the skirt. I kept it very simple, no pockets, invisible zip at the side, no visible seams on the outside. One new thing I tried:  after closing the upper edge of the waist band, I stitched the seam allowance to the inner part of the waist band before folding it over. That way the inner part of the waistband is kept better in place and will not peak out at the upper edge.

The print is not as visible as much as I had hoped and I am still afraid that it might wash out (although I used fabric paint and ironed the thing about a hundred times). Enough reason to try again! Now our summer is almost over but next year I might turn this into an other project with my sons!

Pattern: Burda style 2 / 2010 download-pattern (BM1002 104). I made model B. Alterations: I cut the back in one piece, put the invisible zip into the side seam, omitted the pockets, adjusted the length and have no visible seams on the outside.

Fabric: an old white cotton bed sheet, dyed using  Alisa’s sun-print technique and normal fabric paint bought at the local crafts store.

Will I do it again? YES! Its a fun technique! But next time it will probably something else than a skirt.

This is my contribution to RUMS.

Dieser Blogpost ist auf Englisch. Ich lese und beantworte Kommentare aber gerne auch auf Deutsch.

The post Sun-Print Skirt first appeared on tamtamtiger.wordpress.com.

Autumn leaves

IMG_1803s

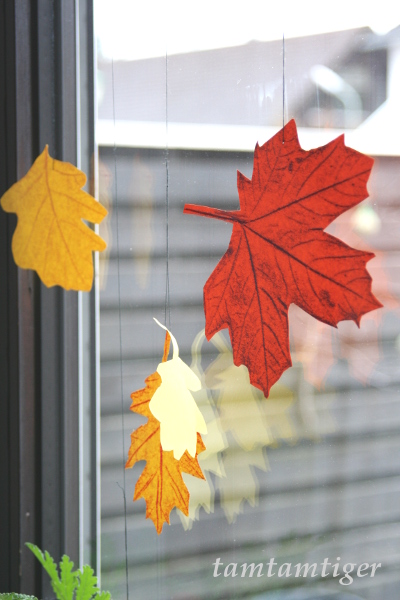
We made some nice fall decoration. Unfortunately I did not take pictures of the process, so I’ll try to explain in words:

First we selected nice leaves from the nearby forest and pressed them (that takes a few days!). Then we places a pressed leave under a sheet of colored paper (in Germany it is called “Tonpapier”, I think it is equivalent to construction paper of thin cardboard) and painted lightly(!) over the paper above the leaves with wax crayons –  suitable are wax crayon-blocks (we use the wax blocks from Stockmar). When painting over the leave underneath the paper the color of the crayon will highlight the coutures of the leave. When the leave is nicely outlined, it can be easily cut out. We attached to a string to hang the leaves into the window.

IMG_1805s

The leaves are nicely moving when there is a draft in the room (e.g. because of an open window or door).

IMG_1808s

This is my contribution to creadienstag.

The post Autumn Leaves first appeared on tamtamtiger.wordpress.com.

Halloween Pumpkins

2016-11-06-halloween-030s

This are our Halloween Pumpkins this year! Once before Halloween we get a carload full of various pumpkins – they are sold everywhere right now. Mostly they are piled high on some field next to the road and you just put the money into an honest-box. So we went, picked our pumpkins, payed and carried them home (they are heavy!). A few years ago we started to try out different carving techniques. Using a set of carving knives one can actually achieve nice effect by just carving off the skin at some places and cutting through at others. Here is one example where I tried to carve some night scene:

halloweenpumpkin2016

The post Halloween Pumpkins first appeared on tamtamtiger.wordpress.com.

Tea shelf

2015.02.08.Winter.027s

We needed an additional shelf in the kitchen to store tea and cereals for easy access. The best husband decided to build it himself since the available space was too small to fit a shelf from the shelf, so to speak.

2015.02.08.Winter.020s

Why painting the shelf in white or a single color? Why not turning this into a colorful family effort?

2015.02.08.Winter.026s

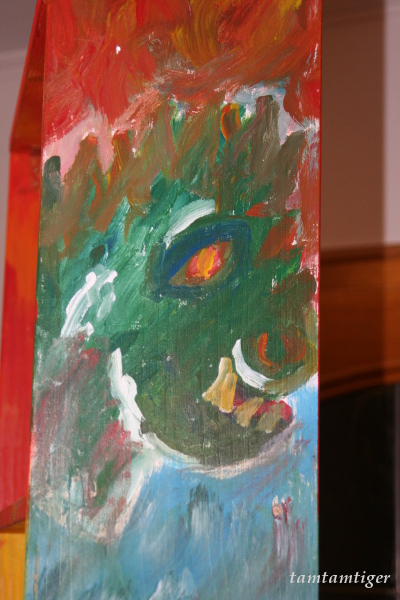
Well, that is what we ended up with: a colorful tea-shelf with a drogon…

2015.02.08.Winter.033s… flowers…

2015.02.08.Winter.035s… butterfly, snail and elephant ….

2015.02.08.Winter.036s… bird…

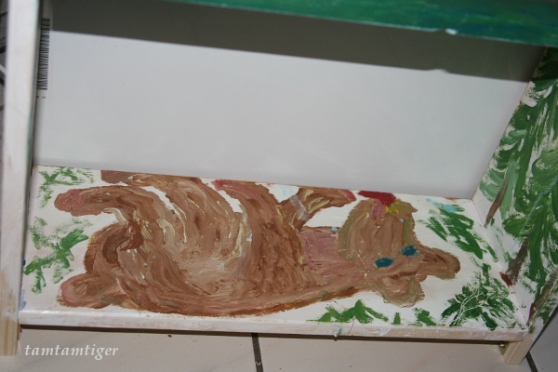
2015.02.08.Winter.029s… and a sleeping bear.

This is a contribution to Creadienstag.

This post first appeared on tamtamtiger.wordpress.com.

Mouse

IMG_1162s

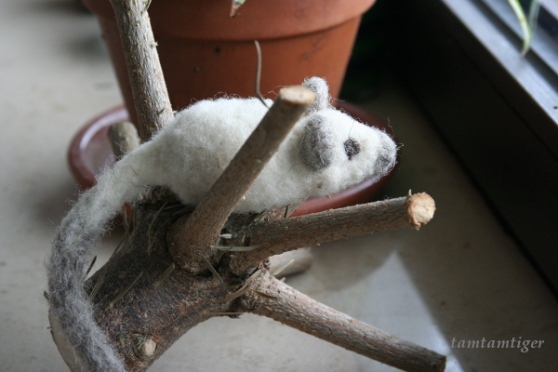
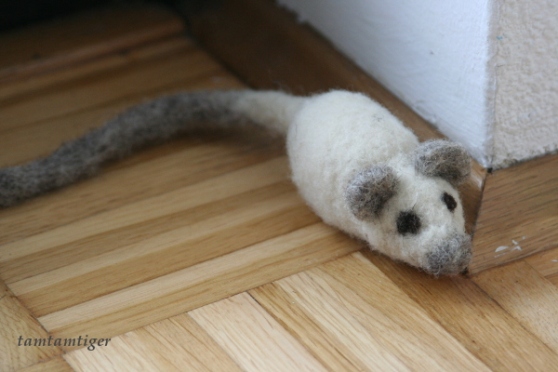
I made a felt mouse. Inspired by the amazing felt animals at KleineViehcher and encouraged by the felting my son does at school, I tried my hands at a ball of wool and a felting needle. Out came this little fellow.

IMG_1164s

The most difficult part was the tail. It is still a bit heavy for the little mouse. I guess mousy needs some friends and I more chances to practice.

IMG_1166s

I will send this mousy now to say ‘Hi!’ at Creadienstag.

This post first appeared at tamtamtiger.wordpress.com.

Home-made-clay pottery

IMG_9833a

I received the most lovely birthday gift! My two older boys (the best husband and our older son) made absolutely wonderful pottery from home-made clay. And because I was so touched and amazed and surprised that one can actually do something like that, I asked the craftsmen exactly how they made it.

We live in an area where the soil is very rich of clay. When we go to the forest, there are small creeks that run through a bed of what looks like almost pure clay. So, my boys set out to collect exactly this type of soil. At home they dissolved it in water to be able to separate the clay from all the other components like sand and twigs and stones etc. They let the sand set and drained the clay solution several times. Now it was time to get rid of the excess water, which turned out to be not so easy. The first obvious  step was to run the solution through a filter made from fabrics. Then they used diapers (!) to get rid of the remaining excess water. I don’t need to tell you what I thought when I happened to find some of the mud filled diapers hiding in my son’s bedroom….. Apparently one of the most important steps is the kneading of the now somewhat dried clay to achieve a  smooth and homogeneous constancy. Otherwise the clay will teer or break very easily.

And thats what they made out of it! They dried the pottery on low temperature in the oven until they where thoroughly dry and then painted the pieces. Lovely, isn’t it?

This is my contrition to Creadienstag.

Christmas tree decoration

IMG_9865a

I needed very quickly a small last minute Christmas gift for my son’s educator. I wanted it to be somewhat personalized so I decided to make a small pendant for the Christmas tree to add to a small gift we bought at the Christmas market. A quick Internet search led me to this nice little birdie. Using some scrap fabrics I made a simplified form of this bird, closed it and stuffed it with wool. I enjoyed sewing it and if I have time (haha!) I will sew a couple more to give as a personal note to dear family members and friends.

It has been very quiet on this blog lately. Having a school kid and work to do and some serious sleep deprivation left me with almost no time and energy to do anything extra. My to-do list of crafting, sewing and mending is growing faster that I can pick up a needle. And if I do manage to finish something and even manage to write something about it then I still need to take somewhat acceptable photos, which is in this dark and gray weather almost impossible.

There has been a nice discussion of some German sewing blogs about (im-)perfect blogging and the the somewhat implied do-it-all-yourself perfect Christmas preparation (for example here and here and here). I admit that I also would love to present on my blog the most beautiful photos and most inspirational text, and I would really like my home to be clean and orderly and prettily decorated.  But I simply can’t. The day has only so many hours and “pretty” just doesn’t make it very often to the top of my priority list. And I agree – being imperfect is human, and that is what I am.

Happy 4th Advent!

Turnbeutel

IMG_9782a

I just don’t know any proper translation of the German word Turnbeutel. Does “gymnastic bag” capture it? Or “sports bag”? Anyway, our older son started school this month and needed a bag for his gymnastic shoes, labeled with name and proper to hang.

IMG_9783_84

So I got this nice fabric at the local fabric store, cut out a piece big enough to hold the shoes, labeled it with a piece of my printing experiments, and closed it with French seams. What I couldn’t figure out is how to do the top seam such that I can pull though a cord, with those French seams in place. So I decided to add an extra stripe of fabric to the top of the bag. For this I cut out two pieces, each 10 cm wide and the length equal to the width of the bag + seam allowance. I joined the two pieces at the narrow ends, but only about 2.5 cm at the edges such that there is an opening in the middle. I then fixed the seam allowance to either side on the seam and opening, folded the stripe (now a loop) in half along the  length and attached it to the top of the bag. I then pulled two cords though the openings on both sides. The cord I made from leftover yarn from my socks.

Pattern: Self-drafted.

Fabric: “Zoo” from Westfalenstoffe, bought at a local fabric store.

This is my contrition to Creadienstag.

Apron and name tags

IMG_9771a

The summer is over and we are adjusting back to normality. My older son turned six last week and will start preschool tomorrow. I am still worried whether I made the right decision to put him into preschool instead of first grade, but I guess only time will tell If it was right or wrong.

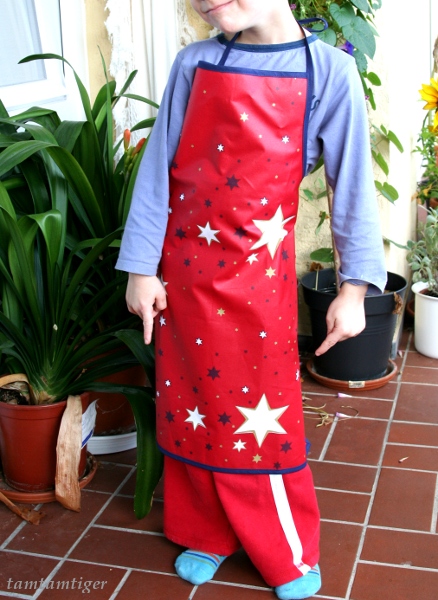
For preschool my son needed an apron, because they will paint and bake and cook a lot there. So I bought some water repellent cotton (the fabric is usually meant to be used as table cloths) and lots of bias binding. I decided to bind the apron in the neck because I feel that the loop around the neck is always too long,  but it still needs to go over the head easily.

IMG_9781a

Also, because everything for preschool needs to be labeled, I carved a name stamp from an eraser and used textile paint to print some name tags on some scrap pieces of cotton fabric. The inspiration for carving stamps I got from Geninne’s wonderful Art Blog, and the idea to stamp name tags for school items I was inspired by Masha-macht-mit.

Pattern: I took the pattern from a child’s apron we have at home.  I just extended the top and bottom a bit to make it longer.

Fabric: Water repellent fabric from a local fabric store and bias binding.

Stamp carving: I used an eraser from Staedtler, a kitchen knife and fabric paint.

This is my contribution to Creadienstag and Made4BOYS!